Since 2010, I've taken over 20 requests for boxart, and the number continually rises with each new series. Many people have asked time and time again just how you do it, and I'm happy to say that this guide will explain it all. To call it a "guide" or a "tutorial" would be a misnomer, as most of the work will be done by yourselves, although I'll attempt to explain the process as best as I can. By the end of this guide, you should be able to produce fantastic boxart for your own series without any issues.
Credit must be given to Ceres, for creating the original template, and Kroki for creating a lovely new border/logo to replace the old AAO vector logo. Without the former, especially without him, this guide wouldn't be here today. =)
▬▬▬▬▬▬▬▬▬▬▬▬▬▬▬▬▬▬▬▬▬▬▬▬▬▬▬▬▬▬▬▬▬▬▬▬▬▬
~~ Let's Begin! ~~
EDIT: Ceres/Mr. Incognito has released an updated boxart template. The general format mostly mirrors the tutorial, so there shouldn't be any troubles working with it! Download his template here!http://www.mediafire.com/?j6aqcpv6vky446v
To begin with, you'll need a handy template, which I pieced together using the resources of Ceres' original template along with my own custom modifications and Kroki's new logo he devised in late February (posted in the Topic of Randomness). You can download it from the MediaFire link, although if this no longer works, please inform me by posting in the thread or sending a PM. You will also need to use Adobe Photoshop as the provided file is a .psd, and I can't guarantee it will work in GIMP and Paint.net as I've never tried it out before.
* A GIMP .xcf file of the template was provided by Kroki. If you can't open the .psd in GIMP or Paint.net, it's best to try this one out,
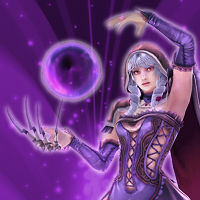
For your character art to place on the boxart, I recommend the use of Creative Uncut's art gallery along with the Media Art file on Court-Records... you can find plenty of scans from the various artbooks on the latter, and official art with transparency in the former. Alternatively, you can also use HD sprites which work rather well, actually.
▬▬▬▬▬▬▬▬▬▬▬▬▬▬▬▬▬▬▬▬▬▬▬▬▬▬▬▬▬▬▬▬▬▬▬▬▬▬
~~ Designing Your Boxart ~~
Once you have downloaded the template and opened it up in Photoshop, make sure that the Layers window is opened to find five folders, or 'Groups' as the correct terminology when describing the program. These groups unstack to reveal set of layers in each of them, which can be easily accessed on the small arrow head pointing to the right ( > ). You'll also noticed that with the exception of the group titled 'AJAA and T&T boxart', the groups are numbered from 1 to 4. This is the order in which you'll need to follow in order to make the final product.
- 1. Background: Two options are available here for you to choose from. You can make an AJ/AAI-esque boxart with a gradient background or go for a T&T-esque style.
2. Character Boxes: There are three options available to choose from. The first, T&T is for if you choose to go with a T&T styled boxart. The second, "Normal" is what it is. The third, "Gradient" is almost identical to #2, except that it has a subtle gradient background, à la AJ:AA. In this stage, you paste, resize (if necessary) and crop the artwork in each of the boxes.
3. Character Effects: Character effects is the stage following the placing of character art. The first frame is titled 'Drop Shadow' effect and will act differently (more later in the stage). The second and third are a 'white wash' transparency effect that overlays the character art and boxes... the one indicated "T&T" is for the "T&T" style.
4. Logos: The final stage is to choose which logo you'd like on the box.
▬▬▬▬▬▬▬▬▬▬▬▬▬▬▬▬▬▬▬▬▬▬▬▬▬▬▬▬▬▬▬▬▬▬▬▬▬▬
~~ Step 1: Background ~~
The first step is remarkably simple along with the rest as you'll find -- the template will really cut down the time that you might have spent designing a boxart from scratch! It's really saved me quite a number of times, although once you end up completing two dozen requests, you do get rather tired of following the steps over and over... xDYou have the option of two styles, although those who use Photoshop extensively can alternate and come up with other styles, which could be posted in this thread, if anyone is interested. The current two available are the AJ/AAI and T&T styles. For the latter, each layer in following folders is indicated in its name with "T&T" to show that they go with each other. You are free to mix between AJ/T&T styles, although I wouldn't recommend it as it doesn't look particularly pleasant, in my opinion...
Helpful Hints: You can edit the gradient layer and change the colours, or come up with your own gradient style. Alternatively if you choosr the T&T version, changing the hue from blue to another colour of your preference is simple. Simply click the layer, "T&T background" and open up the Hue/Saturation menu (Ctrl+U on Windows, or Image > Adjustments > Hue/Saturdation). Slide the "Hue" bar until you're happy!
~~ Step 2: Character Boxes ~~
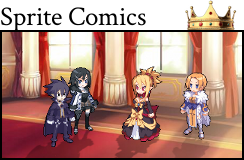
The second step is to choose the character boxes. These are what the 'four' characters on the front sit in... and like the previous step, there are several variants for you to choose from. The first, entitled T&T, is for the T&T background. The "Normal" and "Gradient" are for AJ/AAI. The difference between the two is as you can guessed - one is a simple plain colour while the other is a gradient, a subtle one at that. My personal preference is the gradient as it is rather striking when the characters are added.Once you've selected your character box, it's now time to add in your character artwork! Paste them on top of each box, resize if necessary and crop so that it sits nicely inside the box with the clean black outline surrounding it. Be extra careful with the T&T boxes as the outlines have a 'white wash' effect already present... When you're happy, it's time to move onto Step 3!
Helpful Hints: Try not to place the character artwork within the 'group folders'... I recommend that it is placed above "2. Character Boxes" yet below "3. Character Effects" in order for the next step to work properly.
~~ Step 3: Character Effects ~~
Arguably a bit more challenging as you'll be playing around with invisible layers without turning them on! There are three layers packed inside this group... the first is titled "Drop Shadow effect", the second "White Wash effect" and the third is "White T&T'. Note that these layer effects are actually optional! You are fully entitled to move onto the final step, but I prefer the sharpness of a drop shadow and a 'white wash' overlay... Regarding the first layer, "Drop Shadow effect", you won't actually be turning it on. Instead, you need to right-click on it and select "Copy Layer Style". Move to each piece of character artwork and right-click on their respective layers. Scroll down to "Paste Layer Style" and voila! You're set with a sharp drop shadow effect. Nice, right?
The 'white wash' effect isn't accurately named... what it is is a white background at 100% opaque and then slowly reduced until 0% transparency. You may notice in the GS1~3 artwork that such an effect is present. I've included the effects, so all you need to do is turn on the layer. That's it.
~~ Step 4: Logo ~~
You're almost done! All you need to do now is select which snazzy AAO logo you'd prefer! There's the option of the official vector which Meph designed for the site or Kroki's recent "jaquette". They both look pretty fashionable, so you can go with what you like, or even come up with your own!The third addition is the "Capcom" logo, I won't say anymore about it,
~~ Step 5: Admire! ~~
And you're finished! This is a tried and tested method that I've used since 2010, so there shouldn't be any issues. Please feel free to post your own creations in the thread or raise any questions/concerns you have. If you'd like pictures as well because you didn't understand what I wrote, just say so! Have fun!
▬▬▬▬▬▬▬▬▬▬▬▬▬▬▬▬▬▬▬▬▬▬▬▬▬▬▬▬▬▬▬▬▬▬▬▬▬▬
~~ Step X: Fangame Logo! ~~
Thanks to E.D.Revolution for reminding me about this step, one of the most important when designing your own boxart. As someone who has developed many logos for over a dozen users on the site, I know that designing a logo can be pretty tough. In fact, I was pretty poor at it before Auraion came along and wrote up a fantastic guideto help us all out. You can find an in-depth tutorial at the provided hyperlink on how to make your own custom logo.